Hello everybody, it’s me again, Dan, welcome to our recipe site. Today, I’m gonna show you how to make a special dish, fluffy and moist chocolate sponge cake. One of my favorites food recipes. For mine, I will make it a little bit tasty. This is gonna smell and look delicious.
Chocolate Sponge Cake - Fluffy, moist and perfectly leveled - this sponge cake recipe is the one to have as it works every time. How to make the Chocolate Sponge Cake. Prep: Gather your ingredients and measure them before starting.
Fluffy and Moist Chocolate Sponge Cake is one of the most favored of recent trending meals on earth. It’s simple, it’s quick, it tastes yummy. It’s enjoyed by millions every day. Fluffy and Moist Chocolate Sponge Cake is something that I have loved my entire life. They are fine and they look wonderful.
To get started with this particular recipe, we must first prepare a few components. You can cook fluffy and moist chocolate sponge cake using 11 ingredients and 25 steps. Here is how you can achieve that.
The ingredients needed to make Fluffy and Moist Chocolate Sponge Cake:
- Get 80 grams Cake flour
- Take 10 grams Cornstarch
- Get 3 Eggs
- Make ready 30 grams Egg (beaten)
- Prepare 80 grams Granulated sugar
- Get 30 grams Mizuame starch syrup (refer to the Steps 28 - 29
- Make ready 60 grams ☆Water
- Prepare 20 grams ☆Vegetable oil
- Make ready 15 grams ☆Unsalted butter
- Take 20 grams Pure cocoa powder
- Prepare 1 few drops Vanilla oil
Great recipe for Fluffy and Moist Chocolate Sponge Cake. This chocolate cake is the result of years of playing around with recipes & I personally think it is fab. You get the same incredibly moist & soft sponge I have another recipe for chocolate cake on Zaar but this one has just become by new favourite. Unless I'm baking a really special chocolate cake for.
Steps to make Fluffy and Moist Chocolate Sponge Cake:
- Prepare the cake tin. Grease the tin with oil thinly and line with baking parchment. I cut a piece of parchment paper into a round shape to fit it in. Measure the ingredients.
- Put the ☆ ingredients into a heat-proof dish and warm them up. Add the pure cocoa powder and mix well. To keep hot, place the dish over a bain-marie or on top of the oven while it's preheating.
- Preheat the oven to 170°C. I usually start to preheat the oven while I whisk the eggs.
- Beat 3 eggs and 1/2 and add the sugar in 3 batches. Continue to beat until fluffy. Add the mizuame starch syrup (or honey) to the mixture.
- Beat until the mixture forms a thick ribbon when the hand mixer is lifted. Lower the hand mixer speed to low and beat the mixture for 3 to 5 minutes to make its texture silky-smooth.
- Beat constantly until the mixture forms a thin ribbon that disappears slowly when the mixer is lifted. The texture must be very smooth and delicate.
- Sift the cake flour and cornstarch together through a fine sieve. Whisk the flour mixture in the sieve with a whisk.
- Sift 1/2 of the Step 7 flour mixture into Step 6 and mix gently with a spatula. When the flour is evenly combined, add the rest of the flour mixture.
- Fold in the mixture with a spatula gently until no longer lumpy. Add a few drops of vanilla oil.
- Fold in until the flour is combined well. Add the ☆ cocoa liquid in 3 or 4 batches. Pour the liquid onto a spatula first and drizzle over the liquid overall. Stir well quickly.
- Fold in the mixture by scooping up from the bottom in a circular motion from various positions until the cocoa liquid is well combined.
- Pour the batter into the prepared cake tin from a high point. Do not scrape the batter on the sides of the bowl with a spatula, but tilt the bowl to pour the batter.
- The batter left on the sides of the bowl tends to contain more fat, so it is better not to put it into the cake tin. If you want to put it in, pour it along the sides of the cake tin.
- Give several sharp taps to the cake tin to remove the excess air. Pop the bubbles on the surface with a toothpick and put the tin into the oven quickly.
- Lower the oven temperature to 160°C and bake for about 35 minutes. When you press the centre of the batter with your finger and it springs back, it is done. If it sinks, continue to bake.
- If you want to be sure, use a skewer. When an inserted skewer in the centre comes out clean, it is done. Adjust the baking time according to your oven at home.
- The baking time affects the result. If the cake is removed from the oven too early it might collapse. It is important to se as it goes.
- Do not overcook either. Overcooking may harden the edges or dry the sponge.
- After removing the tin from the oven, drop the cake tin from about 30 cm to get rid of the excess steam. The sponge will settle down to the same height as the sides of the cake tin.
- Remove the sponge from the tin and peel off the baking parchment gently.
- Cover the sponge with a moistened tea towel and leave to cool. After completely cooled, remove the tea towel and wrap the sponge with cling film or a plastic bag.
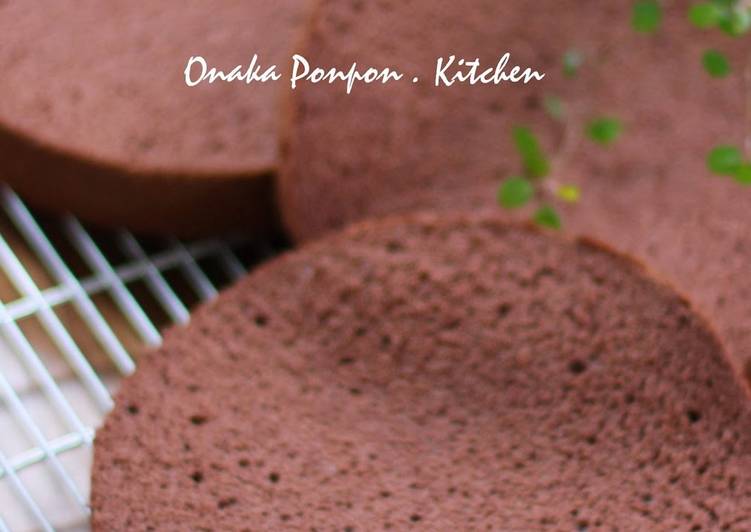
- Unfortunately, this sponge has a crack on the surface. When I mixed with the hand mixer, it was so fast that I mixed the eggs too long, which might cause this.
- I sliced the sponge into 3 pieces horizontally.
- The next day I drizzled with syrup to make a coffee-mocha decoration cake -.
- Chocolate cream decoration -. - - https://cookpad.com/us/recipes/144826-chocolate-decoration-cake
This chocolate sponge cake is ridiculously easy to make once you have the technique down and it's almost impossible to mess it up! What sets a sponge cake apart from other cakes is the method of preparation and ingredients. Recipes like this one call for more eggs than usual, six to be exact! Your search for soft and spongy Vanilla cake ends here. This is the best basic recipe for simple, fluffy, moist plain vanilla sponge cake with butter and hot milk.
So that’s going to wrap this up with this special food fluffy and moist chocolate sponge cake recipe. Thanks so much for reading. I am confident you can make this at home. There’s gonna be interesting food at home recipes coming up. Don’t forget to save this page in your browser, and share it to your loved ones, friends and colleague. Thank you for reading. Go on get cooking!